Showing posts with label linux. Show all posts
Showing posts with label linux. Show all posts
Saturday, 10 March 2018
Monday, 8 May 2017
Perl Panel, an amazing lightweight utility

Enter Perl Panel, it hasn't been updated in some time but it is solid and very customisation. I will be learning how to write applets which are naturally written in Perl, a language I'd like to master even though it isn't as 'cool' as it once was. I've never been one to stick to trends, if it works then I'm happy to use it.
It can be custiomized to you liking, add as many or as little applet to your panel, even have other panels with their own configuration if you like.
Panels can be top or bottom of the screen which works great for me as I prefer panels on the top of the screen.

Perl Panel contains a lots of useful applet out of the box, the ones I rely on are:
- Desktop pager
- Notification area
- Time (my setup is %A %d %b, %H:%M%)
- Window task-list
- Openbox menu
- System monitor
In total there are 34 applets included, I don't have a use for all of them as I have workflow that doesn't change too much. Some of the more notable ones are:
- Drive manager
- Launcher
- CPU temp
- Battery monitor (this on needs fixing, one I'm hoping to do)
- Bookmarks
- Recent files
- Command line area
- Task-list
- Trash
- WiFi monitor
- Webcam
- Shell manager
There is room for improvement though and hopefully I can write the missing applets myself. For example, I'l like to replicate the system monitor of Mate, in my case, I always have CPU, Network activity and Hard disk activity so at a glance I can see what is happening. At the moment, the only monitor close to what I want it CPU monitor, which is the same format as what I'd like so hoping that I can use that module as a basis for networking and hard disks.
One of the issues I had was icon size in the notification area, my clipboard manager (parcellite) icon was about two times too large. All I had to do to fix it was edit the icon, which was in /usr/share/pixmaps/parcellite.png.
I'm hoping others will see the benefit of using Perl Panel because it really is great solution to solve a problem and it does that in a brilliant fashion.
Sunday, 2 April 2017
Customizing the Thinkpad T430
It was time to update my laptop, so of course my first choice was the formidable Thinkpad series. I always prefer to buy refurbished corporate laptops because there is usually a huge mark down on prices and in this case, a new LCD screen and Motherboard.
My new Thinkpad T430 arrived and I tried the installed Windows 10 for all of a night, and I was not impressed. I really wanted to like it but I'm an old grump set in my ways, so off it went and installed the awesome Ubuntu Mate 16.04 LTS on it.
The laptop is FAST, probably because of the solid stat drive, maybe the 8 gigabytes of ram or just due to the no-bullshit strategy of Mate Desktop which makes it the best desktop environment around (with Openbox as the window manager, of course)
Nothing is ever perfect and in this case it was the lack of the menu key (keycode 0x6c), usually situated right of the space-bar. I use this quite often, mostly within Chrome for context menus and in Caja file manager. The T430 has two Alt keys (left and right) and I never use Alt on the right so it is fine to be replaced.
Swap Alt-right with Menu key
This is fine for just the session you are logged in for, but to make the change permanent:
Create the file .Xmodmap and insert the following code, then save
add mod3 = Super_R
keycode 0x6c = Menu
My new Thinkpad T430 arrived and I tried the installed Windows 10 for all of a night, and I was not impressed. I really wanted to like it but I'm an old grump set in my ways, so off it went and installed the awesome Ubuntu Mate 16.04 LTS on it.
The laptop is FAST, probably because of the solid stat drive, maybe the 8 gigabytes of ram or just due to the no-bullshit strategy of Mate Desktop which makes it the best desktop environment around (with Openbox as the window manager, of course)
Nothing is ever perfect and in this case it was the lack of the menu key (keycode 0x6c), usually situated right of the space-bar. I use this quite often, mostly within Chrome for context menus and in Caja file manager. The T430 has two Alt keys (left and right) and I never use Alt on the right so it is fine to be replaced.
Swap Alt-right with Menu key
This is fine for just the session you are logged in for, but to make the change permanent:
Create the file .Xmodmap and insert the following code, then save
keycode 0x6c = Menu
Once you log-out or restart, you should have a working Menu key mapped to the Alt-right key
Caps lock on/off notification
Having a simple program to indicate your caps status is very helpful, especially for hidden text-fields like passwords. My solution is to use a small program called indicator-keylock which sits in your notification area and uses the notifiy daemon to pop up a reminder if your caps lock is on or off. Once installed, it will start automatically, here's how to install it:
sudo apt-get install indicator-keylock
Albert, the best quick launch solution
Quick launchers fall into one of two categories, you either love or hate them. Albert falls into the former, it's a clean and smooth quick launcher that has loads of plugins if you need them, I prefer to keep it in it's default state except the theme. I use Numix-Rounded which ties in perfectly with my favourite desktop colour of #222222.
On my T430, I prefer the keyboard shortcut of Right-ctrl + Print-screen (for whatever reason, sits near the space-bar....wtf?).
The two keys are next to each other so to me, this make perfect sense.
Albert requires a PPA, here's how to install it:
sudo add-apt-repository ppa:nilarimogard/webupd8
(press enter when prompted)
sudo apt-get update && sudo apt-get install albert -y
Personal Keyboard Shortcuts
These keyboard shortcuts are just the way I like things, feel free to use them if it works for you.
Meta C Google Chrome [insert dconf command to set]
Meta W Emacs
Meta O Geany
Meta P Pluma
Meta S Mate Search Tool
Mate Theme
I have gotten used to using the same theme, shortcuts and application on all my computers because it just makes sense. To set up the them, I firstly download the Mist theme from here
Sunday, 27 November 2016
Change Thinkpad T61 page forward/back to page up/down in Linux

There one flaw that I have found, that the Page Up/Page Down keys are in the most awkward of places, on the very top right of the keypad.
There are two keys in prime position that are not utilized at all on Linux, so here is a quick and dirty way to remap the Page Previous/Page Next to Page Up/Page Down.
This is an easy problem to fix through the use of xmodmap in your .bashrc file.
To remap the keys all you need to do is:
- Open your bashrc with vim/emacs/nano ~.bashrc
- Add these two lines to the bottom of the file
xmodmap -e 'keycode 166=Prior'
- Either log out or source your bashrc with source ~.bashrc
Monday, 21 November 2016
How to compile micro text editor on Termux on Android
In Termux we are going to need a couple of packages before we get started; git and golang:
apt insall git golang
Then we need to set the Path in your shell of choice, so open Termux and open the rc file to your shell of choice. I'm using zsh and nano in this case, so this is the command I use:
nano ~/.zshrc
So now we need to set the GoLang path so when we compile the program this is where the binary file will go. Add this line to your .zshrc/.bashrc file:
export GOPATH=$HOME/go
Save and exit, you may need to exit or just source your shell with:
source ~/.zshrc
Now it's time go get the git repo and download it:
git clone https://github.com/zyedidia/micro
cd into the git cloned directory
cd micro
Now we need to compile the install by invoking the make command:
make
It may take a little time and appear to to nothing but it is. Once the command exits, enter the final command of
make install
make install
Sunday, 20 November 2016
Deviot, a much better alternative Arduino IDE
My biggest issues with the official IDE were the lack of customisation, font sizes and rendering are horrible and not extendable at all.
I have found a great plug-in that works with the Sublime text editor, it's not really my text editor of choice, but I found just using the official IDE drove me away from coding the Arduino, so I'm all for using Deviot.
Here's how to get it going on Ubuntu Linux
- Install Sublime Text 3 from sublimetext.com/3
- Open Sublime and open Install package control with Ctrl + Shift + P
- In the dialog, type install package
- Type in Deviot, the package will appear as the search feild is narrowed
- Click on the package an it will be installed
- Confirmation output of "Installation finished, now you can enjoy Deviot!" is displayed in the bottom panel
Thursday, 15 September 2016
Set default template size in Inkscape
- Go to Inkscape and set your desired canvas
- I prefer my measurements to be in pixels and set to a height and width of 1000px x 1500 to fit nicely on my laptop
- Save your desired setup as default.svg in your home directory at ~/.config/inkscape/templates/default.svg
And voilà, we have a new default setup to our liking each time we open Inkscape. You can also save this in your root environment to have it available for all users but moving your default.svg to /usr/share/inkscape/templates with the following commad:
sudo mv ~/.config/inkscape/templates/default.svg /usr/share/inkscape/templates/

Sunday, 4 September 2016
Change menu icon in Ubuntu Mate

- If you don't have a ~/.icons directory, create it in the terminal with mkdir ~/.icons
- Navigate to your icon folder (usually in ~/.icons)
- Copy your desired icon theme there
- Open the 24x24 size
- Open the actions folder
- Create or replace the png icon with the name start-here.png
Sometimes, the icon will be massive and mess up the size of the whole menu bar, to fix this all you need to do is reduce the size of the icon to 24 x 24 px.

If anyone would like the links, here is the small Tux icon and Mist theme
Thursday, 17 December 2015
Using Openbox as your window-manager in Xfce
I find Xfce to be the best all round desktop environment and can't fault it at all, but wanted to merge the awesome experience that Openbox gives in regards to a lightweight window manager.
So, how exactly do you use Openbox on Xfce and still use the application finder, whisker menu and other xfce items...here's how.
First, amusing you have both Openbox and Xfce installed, log into your Xfce session. Open "Settings Manager" and go to "Sessions & Startup".
On the "Session" tab there should be an entry named "xfwm4", go ahead and select it and on the bottom right click "Quit Program".
Then you will see everything go a little haywire because we just killed the window manager, that's normal. Now we are going to start the Openbox window manager that is in my opinion, much better because it can be customized via a text editor; ~/.config/openbox/rc.xml in case your wondering.
Open a terminal and enter "openbox --replace & exit", which will load the Openbox window manager. If you restart now, the default Xfce session will load. So, we need to make sure to save the session inside the "Session" tab we should still be in. On the bottom left, click "Save session" and close the settings manager.
 |
| Xfce running with Openbox window manager |
And as you see, Openbox is now the window manager.
Some key bindings will be doubled up between Xfce and Openbox, so make sure you check your config file and keyboard settings.
Saturday, 21 November 2015
Installing Greenfoot Java in Linux
 Greenfoot is a great tool for learning Java programming. One issue I ran into was setting the default Java environment for it to install.
As it needs JavaFX, it needs the official flavour from Oracle. Most people will have the Open JDK libraries installed along side with Oracle's Java too.
 By using the following command, you can select the version that Greenfoot needs and completing the installation.
sudo update-alternatives --config java
Select the "/usr/java/jdk1.8.0_65/jre/bin/java" or whatever the latest version is for you.


Thursday, 5 November 2015
Wifi not resuming after suspend
In Lubuntu 15.04 wifi there is a bug that causes the wifi to not re-connect after the suspend state is removed. I've found a simple fix to remedy this situation.
I'm using a Acer laptop with the AR9462 Wireless Network Adapter, but this seems to be a generic fix from what I can see so far.
We need to create a file under /etc/pm/config.d/ and add a instruction to suspend a kernel module. So, fire up your terminal and edit the file.
Then add this line into the new file:
SUSPEND_MODULES="iwlwifi"
I've found this quick fix to work well on suspend resume on Lubuntu 15.04.
I'm using a Acer laptop with the AR9462 Wireless Network Adapter, but this seems to be a generic fix from what I can see so far.
We need to create a file under /etc/pm/config.d/ and add a instruction to suspend a kernel module. So, fire up your terminal and edit the file.
sudo nano /etc/pm/config.d/config

Then add this line into the new file:
SUSPEND_MODULES="iwlwifi"
I've found this quick fix to work well on suspend resume on Lubuntu 15.04.
Saturday, 24 October 2015
Install latest version of Geany in Ubuntu and some customizations
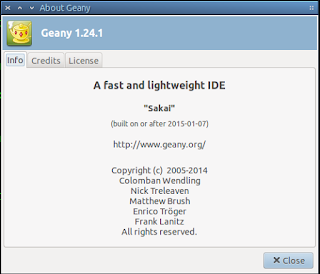 Geany is a great editor, but the version in the reops is at version 1.23.1. If you'd like a more up to date version (1.25 at the time of writing) you can simply add a ppa.
To add the latest builds, add this ppa by opening a terminal and typing:
sudo apt-add-repository ppa:geany-dev/ppa
Then update and install it with:
sudo apt-get update && sudo apt-get install geany

You should now be running Geany 1.25
Customizing the layout

Remove the toolbar
Remove the toolbar
This is a simple step to do by toggling View>Show toolbar and it's gone, same for sidebar and messages bar.
Install new themes
There are a bunch of brilliant themes hosted on github, the ones I like are available here (geany-themes) and here (base-16-geany). I like the geany-themes and it has all I'll ever need, so heres how to install that.
Either download the zip from github or copy the following command:
wget https://github.com/geany/geany-themes/archive/master.zip
then unzip it in your file manager or via the command line with:
unzip geany-themes-master.zip
then cd into the directory:
cd geany-themes-master
In there, you will find a simple bash script to install the themes to your ~/.config/geany directory. To install the themes type the following command:
./install.sh

Remove long line marker

I find it a bit distracting, so to disable it go to;
Edit>Preferences then
Editor>Display and toggle "Long line marker" on or off.
Monday, 12 October 2015
Some emacs tips

I've finally bit the bullet and decided it's time to learn Emacs.
In the past, I've avoided learning this behemoth because of it's steep learning curve. Only thing, it's not that hard.
I should've attempted to learn it ages ago, but better late never. After using Emacs for a while, I'm starting to learn how powerful it is but still in the infancy of the learning curve and looking forward to becomming better at using it. One thing I've noticed is that it's far more capable than any text editor I've ever used, it's more like a complete OS.
So, on to some quick customizations..

I prefer a dark theme that is easy on the eyes and saves eyestrain. To do this, go to Options > Customize Emacs > Custom Themes and I use the "Deeper Blue" theme.
Be sure to click the "Save theme settings" so the changes are persistant.

Adding a repository
One of the first things I do is add the Melpa repositories to give it far more plug-ins. To do this, open Emacs and then your emacs config file:
ctrl x, ctrl f then open your ~/.emacs file.
One of the first things I do is add the Melpa repositories to give it far more plug-ins. To do this, open Emacs and then your emacs config file:
ctrl x, ctrl f then open your ~/.emacs file.

We then need to copy the repository from Melpa into your .emacs config file.
To save the file, use ctrl x, crtl s
To save the file, use ctrl x, crtl s
Then we restart Emacs for the changes to take effect.

Removing the toolbar
Go to Options > Show/Hide > Toolbar and select "None"
You can hide and un-hide other elements to your liking here also.
Switching buffers in Emacs is a hassle to start off with, I'm still getting my head around different methods. But in the mean time, I've found a shortcut that emulates the way we do it in the normal world. You can use plain old ctrl tab to cycle forwards and ctrl shift tab to cycle backwards.
Simply add these two lines to your ~/.emacs config
(global-set-key (kbd "C-<tab>") 'next-buffer)
(global-set-key (kbd "C-S-<tab>") 'previous-buffer)
I've found that it helps the transition to Emacs a bit easier than typing the buffers out in ctrl x, ctrl b

Displaying line numbers is, to me; essential in programming, to quickly find errors and focus where you need to look. For some reason, Emacs doesn't display this out of the box so heres how to get it going.


(Dont forget that paste in Emacs is ctrl y)
And now we have line numbers along the left of the screen, brilliant.

I find it hard to see at times and I'm always increasing the size of the fonts, maybe it's time for glasses.
So if you also need to adjust the default font and font size in Emacs, heres how...

That will bring you to the custimization settings, grab yourself a beverage because there are loads of settings to be toggled off and on.
Whenever you do change something, always remember to click "State" and if you want it to be remembered, then

Emacs measures font size in points, so play around till you find whatever suits you best.
I use Deja Vu Sans 135, works for me.
Another way to increase/decrease font size is ctrl x ctrl +/ctrl x, ctrl -
Other things
If you get confused withe the key bindings and Emacs groans at you, cancel the current command with ctrl g.
You can find an abundance of further tweaks by the shortcut meta x, customize.
I haven't got my head around all the options yet and I'm sure it'll take a long time to understand it fully.
Tuesday, 29 September 2015
Install Wordgrinder .60 in Linux

 .
. Wordgrinder is definitely an awesome application. It's a word-processor for the terminal full of features that you just wouldn't expect. It has spell-checking, bold fonts, italics and import/export to a range of file formats. It really does stay out of your way and lets you get on with writing. I can highly recommend this great application.

Firstly, we need to download the source from github
Secondly, extract the source, if you want to do it via the command line the type this command:
unzip wordgrinder-master.zip
Then we need to cd into the directory
cd wordgrinder-master
Before we start the building process, we need to install a few dependencies
sudo apt-get install libncursesw5-dev liblua5.2-dev zlib1g-dev libxft-dev lua5.2
We then start the install process with this command
make -j
And the final command
sudo make install PREFIX=/usr
We can then start using Wordgrinder in any terminal. I prefer lxterminal, but use whatever you like.
I will be adding more tutorials on customizing the terminal colors and fonts with a shortcut you can place in the menu, so check back soon to find out how.
After upgrading the system, I noticed that the lua filesystem is getting removed for some reason. Obviously this will impact Wordgrinder, so if yours breaks too, run this command to re-install it.
sudo apt-get install lua-filesystem


Saturday, 26 September 2015
Notifications in Lubuntu/Openbox
Customizing Lubuntu is mostly down to personal preference. I like things a certain way and I've listed a tweaks that I do on a fresh install of Lubuntu/Openbox.
 Firstly, we need to install xfce notification daemon by
sudo apt-get install xfce4-notifyd
Then we can change the preferred settings by invoking the following command:
xfce4-notifyd-config
 This is an fundamental for any operating system and Openbox can have it too.
The way to get this working is by installing the xfce volume notifications daemon
sudo apt-get install xfce4-volumed
 Then we navigate to Menu -> Preferences -> Default applications for LXSession
Click the Autostart tab
Then all we need to do is check the XFCE Volume Daemon box
Then a restart is in order to get the fn+vol keys notification working.
Change notification time:
sudo apt-get install xfce4-notifyd
Then we can change the preferred settings by invoking the following command:
xfce4-notifyd-config
Volume notification via fn key:

The way to get this working is by installing the xfce volume notifications daemon
sudo apt-get install xfce4-volumed

Click the Autostart tab
Then all we need to do is check the XFCE Volume Daemon box
Then a restart is in order to get the fn+vol keys notification working.
Friday, 25 September 2015
Multi-select, ctrl space not working in Lubuntu
When using PCMANFM in Lubuntu, I like to have the ability to select multiple items via keyboard shortcuts. By default in Lubuntu 14.04 LTS the keyboard shortcut ctrl space should select multiple items but there is a shortcut conflict that is easy to fix.
 To fix this issue, go to
Menu -> Preferences -> Keyboard Input Methods
So what we are going to change is the "Ibus Preferences" which is responsible for switching different keyboard layouts. I'm not interested in having more than one, so change the option that says "Next input option" to
 some other keybinding you're not going to use, I chose shift space. I also de-selected the tray icon to minimize space too.

Menu -> Preferences -> Keyboard Input Methods
So what we are going to change is the "Ibus Preferences" which is responsible for switching different keyboard layouts. I'm not interested in having more than one, so change the option that says "Next input option" to

Wednesday, 9 September 2015
My setup and work-flow
I have spent a lot of time on Linux to narrow down some favorite applications.
Here's a list, always growing but the ones listed here are tried and tested. The tagline from Linux Luddites suits these applications and me in general too; "We try all the new open source software and decide we like the old stuff better"
Here's a list, always growing but the ones listed here are tried and tested. The tagline from Linux Luddites suits these applications and me in general too; "We try all the new open source software and decide we like the old stuff better"
Subscribe to:
Posts (Atom)